Excel templates are very useful whenever we need to do repeated tasks. Excel VBA does it. But Excel VBA is a little hard to learn and implement.
Excel templates is nothing but pre defined format. For example if you want to get Agent productivity report in Excel. You have raw reports which has productive hours, non productive hours and other details. Instead of doing every day look up and sum function, create template. That create a new sheet. In that put all the fiormula or excel functions and required data. So now onwards whenever you need to do the report, just put the raw reports you will get output immediately.
Advantages of Excel Templates:
- Saves lot of time
- Accuracy of the reports increases as manual work is reduced
- No need to know complicated VB codes.
- Get time explore new things
- Do more analysis on data.
Useful functions and tools to create Excel Templates: Below are minimum Excel formula you should know to create a simple and effective excel templates.
- Pivot tables: This is one of the tool very useful. You can customize the data the way you want to. Create calculated fields in pivot table to enhance the look and get more data.
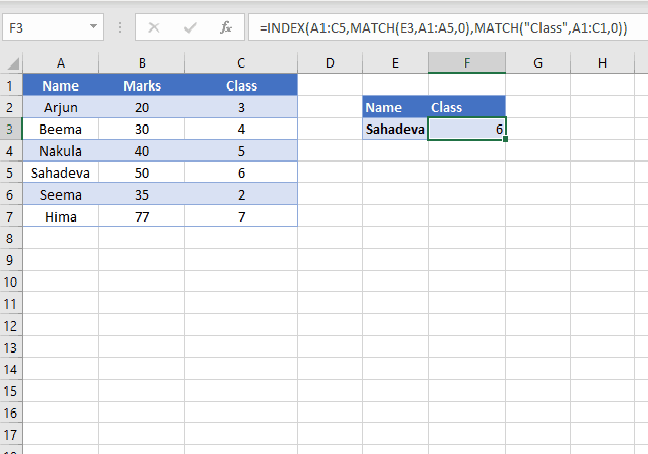
- Vlookup and Hlookup functions: These lookup functions will be very handy while you need to map some fields based on some data criteria.
- Conditional sum and count: Conditional sum function sumif and conditional count function countif are useful when you need to count or sum of the data for a particular data.
- Multi conditional sum and count: There are many occasions we need to find sum or count based on multiple criteria. SUMIFS, COUNTIFS and sumproduct are the useful functions
Tips on Creating Excel Templates:
- Always create a template such a way that, the output of the template matches with desired report format. Do not give a scope for manual work on template on regular basis. This will save time.
- Use Conditional functions to get ride of error codes such as #n/a. For this IF function with iserror function will be very useful.
- While selecting the range, select only the range you have data. Do not select complete sheet. Selecting whole sheet will slow down the template. Using Dynamic ranges will also helpful.