Author: Aniruddh

  • Dr. Aeroguard SCPR 100 Desktop Air Purifiers

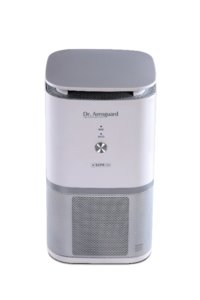
    Eureka Forbes has introduced desktop Air Purifier Dr. Aeroguard SCPR 100 in India. It is a compact air purifier with good set of features. Priced at Rs.8,999, it is one of the affordable air purifier which  is also certified by the world renowned German ‘gui-Lab’.

    Dr. Aeroguard SCPR 100

    Outdoor and indoor air quality in most of the big cities are becoming worse and worse day after day. Emission of small particles from power plants, factories, vehicle exhausts and from the burning of coal, wood etc are the main culprits for air pollution.  With increase in air pollution, diseases are also increasing.

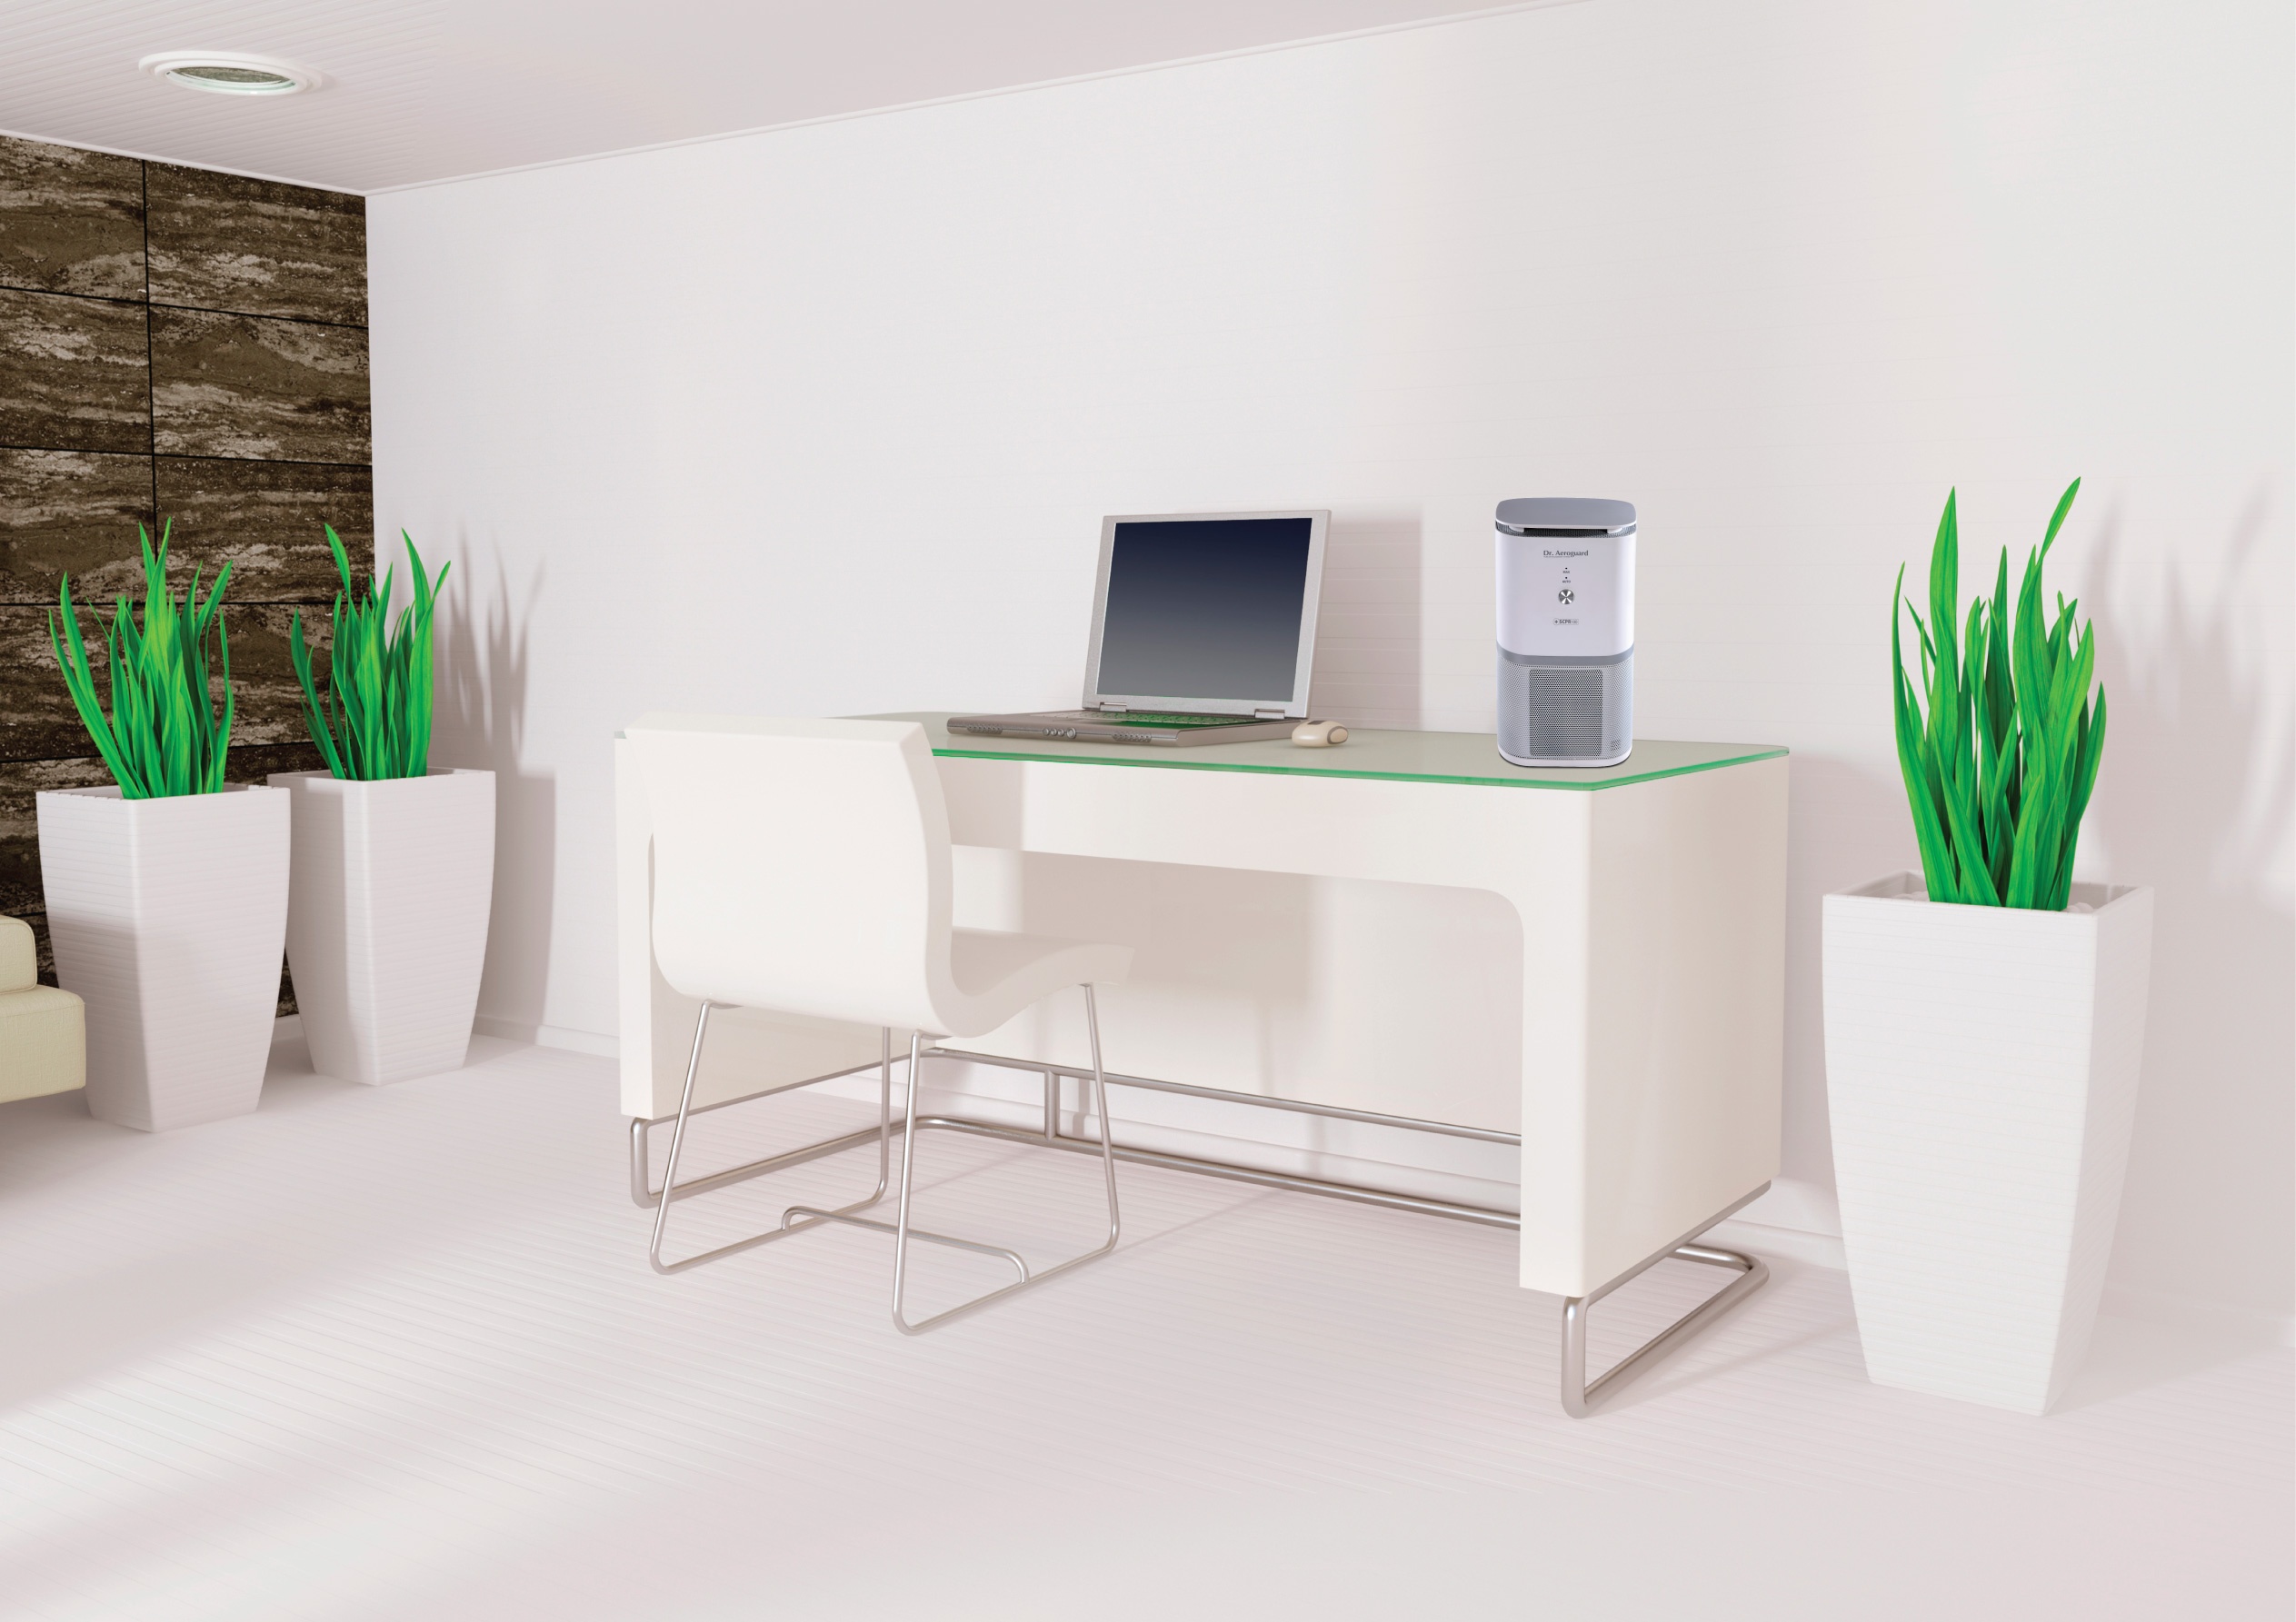
    Most of us spend 90 percent of our time in indoors. Getting pure air outdoor is very difficult. But even indoor air quality is becoming bad. According to US Environmental Protection Agency (EPA), air inside our homes & offices can be up to 10 times more polluted than the outside air. There comes the indoor air purifiers.

    Air purifiers are high tech devices that claim to clean the indoor air by removing impurities such as dust particles, pollen, smoke etc. But these devices were expensive. To address this, Eureka Forbes introduces budget air purifier called Dr. Aeroguard SCPR 100.

    Dr. Aeroguard SCPR 100_1

    Dr. Aeroguard SCPR 100 is powered by Activeshield x 2 filtration system. According to company, the ultra-precision purification process of the SCPR100 has double the efficiency of purifiers in its class to eliminate sub-micron respirable particles and infection-carrying microbes in the air. Dr. Aeroguard SCPR100 not only sense, clean and purify, it revitalizes the air using a perfect blend of Silver Ions, Diatoms and Vitamins, making the air pure and healthy.

    Dr. Aeroguard SCPR 100 Key Features

    • Compact form factor.
    • Activeshield Filtration System.
    • Anti Dust & Anti allergen Filter.
    • Active HEPA filter.
    • Vita Ion
    • One touch control.
  • How to take screenshot on Asus Zenfone 3

    This year Asus has launched multiple variants of Zenfone 3. This includes Zenfone 3 Deluxe, Zenfone 3 Laser and Zenfone 3 Ultra to name few. In this post we will learn on how to take screenshot on Asus Zenfone 3.

    How to take screenshot on Asus Zenfone 3

    Recommended Reading:

    Asus Zenfone 3 FAQ

    How to take screenshot on Asus Zenfone 3

    There are multiple ways through which you can capture screenshot in Zenfone 3.  Here are the simple ways to perform print screen on this device.

    1st Method: Using the hardware keys

    This is the most common way of capturing screenshot on any Android smartphone which works on this device as well.

    • Go to the screen on which you want to take screenshot.
    • Press and hold volume down and power button simultaneously.
    • The screenshot will be captured.

    2nd Method: Taking screenshot on Zenfone 3 using screenshot button

    For capturing screenshot using this method, you need to customise on the quick settings option. This is one time settings.

    • Go to quick setting options which you can access by swiping down on home screen.
    • Now tap on to edit(2nd icon from top right).
    • Under “Select tools to show on quick settings panel”, enable “screenshot”.
    • As you can select only 4 tools, you might need to disable any of one of the currently showing tool.
    • Now whenever you want to take screenshot, go to quick settings panel and tap on to screenshot button. The screenshot will be captured.

    3rd Method: Taking screenshot on Zenfone 3 using recent apps button

    To take screenshot on Asus Zenfone 3 using this method, follow the steps given below.

    • Go to settings->”Asus customised settings”.
    • Tap on to Recent apps key.
    • Select “Tap and hold to take screenshot”.
    • Now whenever you want to take screenshot, tap and hold recent apps key. It will take the screenshot.

    How to set screenshot file format in Asus Zenfone 3 and where the screenshot will be saved?

    • To set the file format of taken screenshot, go to Settings->Screenshot option.
    • Tap on to Screenshot file format. You have the option of selecting JPEG or PNG.

    The taken screenshot will be saved in the gallery folder.

    If you find any difficulty in following this post on How to take screenshot on Asus Zenfone 3, please share it in the comment section below.

  • Lenovo Z2 Plus FAQ Tips and Tricks Cons

    Lenovo has launched Z2 Plus smartphone in India which is a rebranded version of ZUK Z2 which was launched in China. It is one of the most affordable smartphone in India with Snapdragon 820 Soc. In this post we will have a quick look into Lenovo Z2 Plus FAQ Tips and Tricks and Cons.

    Lenovo Z2 Plus

    Lenovo Z2 Plus FAQ Tips and Tricks and Cons

    What are the different variants of Lenovo Z2 Plus available in India?

    Lenovo Z2 Plus is available in 2 variants based on the RAM and internal storage option. The base model has 3GB of RAM with 32GB of internal storage and another model has 4GB of RAM with 64GB of internal storage. Coming to colour options, Z2 Plus will be available in Black and White options.

    What size sim cards Lenovo Z2 Plus supports? Does it has expandable storage option?

    Z2 Plus supports 2 nano sim cards and does not supports microSD card.

    What is the price of Lenovo Z2 Plus in India? Where it can be purchased?

    Z2 Plus is available in 2 variants. The prices of these variants are given below.

    • 3GB RAM with 32GB of internal storage-Rs.17,999
    • 4GB RAM and 64GB of internal storage-Rs.19,999

    Lenovo Z2 Plus is available exclusively via Amazon.in. The link to product page is here.

    What are the specifications of Lenovo Z2 Plus?

    Summarised specification is given below.

    • Snapdragon 820(Dual core 2.1GHz Kryo and Dual core 1.6GHz Kryo).
    • 3GB/4GB RAM with 32GB/64GB internal storage.
    • 5 inch full HD IPS display screen.
    • 13MP primary camera and 8MP front facing camera.
    • 3500 mAh battery.
    • Fingerprint scanner.

    What are the box contents?

    Handset, sim ejector tool, manuals, USB to USB type-C cable and charger.

    What are the SAR values of Lenovo Z2 Plus?

    The SAR values mentioned on the box are 0.71W/Kg@1g(Head) and 1.49W/Kg@1g(Body).

    Any Z2 Plus Fingerprint scanner tips and tricks?

    The device sports “U touch 2.0” fingerprint scanner on the front. It can be used for different tasks using different gestures such as single touch for back; a long touch to bring up notifications; a double press for the app switcher; left or right swipes to get to recently used apps; a single press for home; and a long press for Google Now etc. You can also customise this by going to settings->U-touch->Physical home button customisation.

    How to take screenshot on Lenovo Z2 Plus?

    You can capture screenshot on Lenovo Z2 Plus using 2 different easy method.

    • 1st method: Go to quick menu option. Select the screenshot button. Screenshot will be captured.
    • 2nd method: Press and hold volume down and power button simultaneously. The screenshot will be captured.

    Does this device supports fast charging?

    Yes. It does supports fast charging. But unfortunately the bundled charger is not fast charger. You need to buy fast charger 3.0 separately.

    How to use Lenovo Z2 Plus as modem?

    You can use this device as modem through WiFi Hotspot or USB tethering or Bluetooth tethering.

    What are the different sensors available on this device?

    The sensors in the device includes gyroscope, compass sensor, accelerometer, light sensor, and proximity sensor.

    What are the cons of Lenovo Z2 Plus?

    This is not a complete review. Based on the specifications, we felt below are the few demerits of Lenovo Z2 Plus. I will be making a detailed review in which I will cover all the pros and cons.

    • No Optical image stabilisation. It features only electronic image stabilisation.
    • There is no bundled fast charger.
    • Does not support expandable storage via microSD card.
    • No IR blaster.
  • Moto E3 Power FAQ Tips and Tricks Cons

    Lenovo has launched Moto E3 Power smartphone in India. This is the successor to last years Moto E and will compete with the likes of Redmi 3s ,Redmi 3s Prime. Coolpad Mega 2.5D etc.  In this post we will have a quick look into  Moto E3 Power FAQ Tips and Tricks Cons.

    Moto E3 Power FAQ Tips and Tricks Cons

    Recommended Reading

    Redmi 3s Prime Review

    Moto E3 Power Review-Pros and Cons

    Moto E3 Power FAQ Tips and Tricks Cons

    What are the different variants of Moto E3 available?

    Moto E 2016 is announced in two variants. Moto E3 and Moto E3 Power. However, only Moto E3 power is launched in India. The key differences are RAM(1GB vs 2GB), Internal storage(8GB vs 16GB) and Battery(2800 vs3500 mAh).

    What is the price of Moto E3 Power in India? Where it can be purchased?

    Moto E3 Power price in India is Rs.7999. It is available exclusively on Flipkart. The link to the product listing is given here.

    What are technical specification of Moto E3 Power?

    Summarized specifications of Moto E3 Power is given below.

    • 64-bit 1GHz quad-core MediaTek MT6735P processor(Cortex A53) with 2GB of RAM and Mali T-720 GPU.
    • 5 inch 720p HD display screen.
    • 16GB of internal storage and support for microSD card.
    • Dual sim(4G+3G).
    • 8MP primary camera and 5MP secondary camera.
    • 3500 mAh battery.
    • Android 6.0 Marshmallow.

    What size sim cards Moto E3 Power Accepts?

    Moto E3 Power supports 2 micro sim cards.

    How to take screenshot on Moto E3 Power?

    You can take screenshot on Moto E3 Power using two methods. One is using the power and volume button. You need to press and hold Volume and Power button simultaneously. The screenshot will be taken. Alternatively, you can take screenshot using the Google Now on tap feature. Using this method you can share or save the screenshot to google drive. Below is the video guide on how to take screenshot on Moto E3 Power. It is done on Moto G4 Plus, as both share same UI, it works on Moto E3 Power as well.

    How to set custom ringtone in Moto E3 Power?

    To set custom MP3 ringtone on Moto E3 Power, you need to paste the ringtone to Ringtones folder. You can use File Manager which comes pre-loaded in the device. Alternatively you can connect your device to PC and paste the ringtone to Ringtones folder.  The third party file managers like ES file explorer will provide an option to select the ringtone from Sounds and Ringtones option from Settings itself. You can refer the video below on How to set ringtone on Moto G4 Plus which works on this device as well.

    Does Moto E3 Power Supports Reliance Jio VoLTE?

    Yes. It does supports 4G VoLTE. With Reliance Jio sim card you can make voice calls in this device.

    What are the cons of Moto E3 Power?

    This is not a complete review. Based on the spec sheet, below are the few Moto E3 Power Cons.

    • Compared to competition, low powered SoC.
    • No Fingerprint scanner.
    • No Compass sensor.

    These are some of Moto E3 Power FAQ Tips and Tricks Cons. If you have any question on this device, then share it in the comment section below.

  • Samsung Galaxy On7 Pro Cons-Reasons not to Buy

    Samsung Galaxy On7 Pro is a budget Android dual sim Smartphone priced at Rs.11,190. It is a revised variant of last years Galaxy On 7. The improvement over its predecessor are 2GB of RAM and 16GB of internal storage. Considering the price, other available devices are Le 2, Lenovo Vibe K5 Note, Redmi Note 3 and Redmi 3s Prime. Comparing with these devices, here are the Samsung Galaxy On7 Pro Cons or disadvantages.

    Samsung Galaxy On7 Pro Cons

    Samsung Galaxy On7 Pro Cons-Reasons not to Buy

    Lack of basic sensors

    Nowadays we do get smartphones with fingerprint scanner in this price segment. However, we can give excuse for Fingerprint scanner. But lack of basic sensors like Ambient light sensor, Magnetic/Compass Sensor is not acceptable considering the price.  Also it impacts on the smartphone experience.

    Slightly outdated SoC for the price

    Samsung Galaxy On 7 Pro comes with Qualcomm Snapdragon 410 clocked at 1.2GHz coupled with a Adreno 302 GPU, 2GB of RAM. This SoC is used in its predecessor as well. Only the RAM size is increased from 1.5GB to 2GB and internal storage is now 16GB instead of 8GB. We are not saying performance is bad on this device, but we expected better SoC considering the price.

    No sAMOLED display screen

    5.5 inch screen with 720p resolution is big let down if you are a media consumer.  We are seeing most of the smartphones in this price segment features full HD display panels. Galaxy J series comes with sAMOLED screen which improves the viewing experience. But this device comes with IPS display panel and not the sAMOLED display screen.  In 2016, a smartphone which is priced above 10k with 720p resolution for 5.5 inch display is not acceptable.

    No LED Notification Light and secondary Noise cancellation mic

    LED notification helps the users to know about notifications without touching the device. It is a very useful function. The secondary noise cancellation mic does improve call quality by lowering the background noise. However, Galaxy On 7 Pro does not features both of them.

    Same old boring design

    Samsung Galaxy On 7 Pro comes with plastic build which we have seen in the previous models. The quality of removable back cover is also poor. At present, Samsung has 8 devices in the price range of 8-12k. The design and build quality of all of them are very much similar except minor differences.

    This is not a Samsung Galaxy On 7 Pro review. In this post, we have listed only the cons which we felt on the device. It has many advantages as well. Such as dedicated microSD card slot, S Bike mode, timely security patch updates, decent battery life etc. Knowing Samsung Galaxy On 7 Pro demerits/disadvantages will help you to set your expectation from the device.