Author: Aniruddh

  • Windows 10 Tips to Improve performance

    Windows 10 brings lot of new features such as revamped start menu, digital assistant Cortana, action center etc. It is also brings in lot of improvement interms of performance. But, there are many annoying features too. These feature slow down and eat up bandwidth of PC. After I got Windows 10 update, my system got slow down. I did many performance steps. But actually, below mentioned tips helped to boost the performance on Windows 10. Even, i was facing issue of hard usage 100%. Now, it is fixed. Here is the some of the tips and tricks to speed up Windows 10 which helped me.

    Windows 10 Tips and Tricks to speed up the PC/Laptop

    1. Stops Windows sharing your bandwidth for delivering update to others:

    Windows 10 Tips

    By default Windows 10, shares your internet connection to deliver update to other users. This is done through peer-to peer fashion. This not only consumes your system resources, it also consumes your data. So if you are having limited data, then you will get effected as upload data increases. So here is the guide to disable this feature.

    • Go to ‘Settings’. Under settings to ‘Update and Security’.
    • Open the Windows Update tab in the left of the screen.
    • In the page, you will find ‘Advanced Options’ link. Click on it.
    • Click on ‘Choose how updates are delivered’ and toggle the switch under it to the off position. Or if you wish you can opt only “PCs on my local network”.

    2. Limit Notification to save power

    Disable Windows Notifications

    Like Android and iOS, Windows 10 too added notification center. This gives an overview of new emails, updates, plugged in devices and more.  For providing these notifications, Windows 10 frequently checks all apps for new notifications. It affect performance and battery life. I personally recommend you to disable all notification which you don’t want. The minimum notification, better. For disabling notifications, follow the steps given below.

    Go to ‘Settings->System->Notification and settings. Toggle Off for the notifications which you want to disable.

    3. Turn Off Windows Tips

    By default Windows 10 shows tips and tricks for many features. Behind this there is service running called ‘Show me tips”. This some time causes high processor and RAM usage. So disable this, go to the page which we have mentioned above and switch off ‘Show me tips about Windows’.

    4. Disable Wi-Fi Sense

    Wi-Fi Sense is the features which is originally intriduced in Windows 8.1 Mobile. This feature enables you to share your Wi-Fi network access with your Facebook, Outlook.com, and Skype contacts. It works in the background. It is good feature. But if you don’t use this, then it is adviced to disable this. It will save you resource usage.  For that follow the steps given below.

    • Go to WiFi Settings and select Change Wi-Fi settings option.
    • In the newly opened page, choose Manage Wi-Fi settings.
    • Here, under “Connect to networks shared by my contacts”, you can toggle off. You can select few contacts or you can disable all as per your wish.
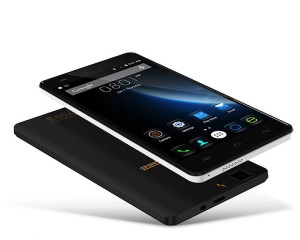
  • DOOGEE X5 Pro 4G Smartphone With 5 inch Display And 2GB RAM

    DOOGEE X5 Pro is a dual sim 4G LTE supported Android smartphone. The key features of this smartphone includes 5 inch IPS display, 2GB RAM, 16GB internal storage, Android 5.1 with simplistic UI. DOOGEE X5 Pro price is $79.99 after a discount from Gearbest.

    DOOGEE X5 Pro has 5 inch IPS display screen with resolution of 1280×720 pixels and 297 ppi pixel density. The device runs on Android 5.1 with simplistic UI on top of it. It has features such as Double Tap to wake up, Smart gestures etc. The sensors in the device are Gravity sensor, Light sensor, Proximity sensor.

    DOOGEE X5 Pro 4G

    DOOGEE X5 Pro runs on 1GHz MediaTek MTK6735 quad-core processor with 2GB of RAM and Mali-T720 graphics. There is 16GB built in storage in that 12GB is user available. This DOOGEE 4G smartphone supporyts microSD card upto 32GB.

    DOOGEE X5 Pro houses a 5MP rear primary camera with LED flash. It also features 2MP front facing camera. The connectivity features are Bluetooth v4.0, Wi-Fi 802.11 b/g/n, 4G, 3G, aGPS, micro USB, and USB OTG. X5 Pro is powered by 2,400 mAh battery which is rated to provide 680 minutes of talk time and 72 hours of standby time.

    This DOOGEE X5 Pro dual sim 4G smartphone measures 143 mm x 72.2 mm x 8.8 mm and weighs. As per the gearbest listing, this device comes in Black and colour variant. This smartphone accepts dual Micro SIM.

    DOOGEE X5 Pro Specification

    • Android 5.1 with simplistic UI.
    • 5 inch IPS display with 720p HD resolution.
    • 1GHz MediaTek MTK6735 quad-core processor,2GB of RAM , Mali-T720 graphics.
    • 5MP rear camera with LED flash.
    • 2MP front facing camera.
    • 2,400 mAh battery.
    • Bluetooth v4.0, Wi-Fi 802.11 b/g/n, 4G, 3G, aGPS, micro USB, and USB OTG.

    We are seeing lot of smartphones launching within $100 price tag and offer great features in spec sheet. The recent launches such as Coolpad Note 3, Meizu M2 offer lot of features in very attractive price. DOOGEE X5 Pro one smartphone which is trying to attract customers using good specification and very cheap price.

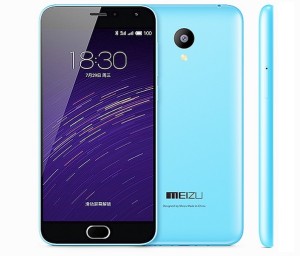
  • Meizu M2 With 4G, 5 inch HD Display, 2GB RAM at Rs.6999

    Meizu M2 is one more 4G enabled dual sim Android smartphone which is rich in features and low in price. The key features includes 5inch HD display, 2GB of RAM, 13MP & 5MP cameras and Quad Core processor. The price of Meizu M2 in India is Rs.6,999. As per current trend, this smartphone too available via flash sale from Snapdeal. The fist flash sale happens on Monday. Outside India, Meizu M2 priced at $152.99 in Gearbest after 30% discount from the portal.

    Meizu M2 runs on Android 5.1 and Flyme UI 4.5 on top of it. The device comes equipped with 64-bit quad-core MediaTek MT6735 processor clocked at 1.3GHz, along with 2GB LPDDR3 RAM and Mali T720 GPU.  This Meizu dual sim Android smartphone has 5 inch display screen with resolution of 720×1280 pixels and pixel density of 296 ppi. The screeen has AGC Dragontrail protective glass to protect the display from scratches. The screen to body ratio on this device is 75.6% which looks very impressive.

    Meizu M2 sports 13-megapixel rear camera with a f/2.2 aperture and a LED flash. Lens glass has Corning Gorilla Glass 3 protection. For selfie lovers, Meizu packed a 5MP front facing camera with  f/2.0 aperture, FotoNation 2.0 smart selfie enhancement, and Face AE face light boost functionality. The built in storage capacity, M2 has Samsung-made 16GB inbuilt eMMC 5.0 flash storage. MicroSD card can be added upto 128GB.  But do note that, the second sim is hybrid. That is either you can use 2nd sim card or microSD card.

    Meizu M2 4G

    Meizu M2 is powered by 2500mAh battery which is rated to deliver up to 23 hours of talk time on 2G, 10 hours of internet surfing on 4G and 680 hours of standby time. The connectivity features of the device are 2G, 3G, GPS, A-GPS, dual-band Wi-Fi 802.11 a/b/g/n, Micro-USB, and Bluetooth 4.0. The M2 smartphone support 1800MHz FDD-LTE band in India. However, 2300MHz TDD-LTE band is not supported.

    Meizu M2 has polycarbonate unibody and measures 68.9×8.7×140.1mm. The weight of this smartophone is  131 grams. M2 will compete with the likes of Redme 2, Moto E 2nd Gen and Lenovo A6000 Plus.

    This festival season is very good for the smartphone lovers. Within the price tag of 10k, we have lot of options. The addition of Coolpad Note 3 with fingerprint scanner at Rs.8,999 and this smartphone further intensifies the competetion.

    Meizu M2  Specification

    • Android 5.1 and Flyme UI 4.5
    • 1.3GHz 64-bit quad-core MediaTek MT6735 processor, 2GB LPDDR3 RAM, Mali T720 GPU.
    • 5 inch 720p HD display screen
    • 13MP primary camera with LED flash.
    • 5MP front facing camera.
    • 2G, 3G, GPS, A-GPS, dual-band Wi-Fi 802.11 a/b/g/n, Micro-USB, and Bluetooth 4.0.
    • 1800MHz FDD-LTE band support.
    • 16GB internal storage and support for microSD card.
    • 2500mAh battery.
  • Coolpad Note 3 With Fingerprint Scanner and 3GB RAM at Rs.8,999

    Chinees manufacturer Coolpad has launched its Note 3 smartphone in India. The device is exclusively available via Amazon.in. The first flash sale happenes on October 20, 2PM IST. User registration for the sale is already open. Coolpad Note 3 price in India is Rs.8,999. The key features of the device are 5.5 inch 720p HD screen, 3GB RAM and fingerprint scanner.

    Coolpad Note 3 is a dual sim smartphone and runs on Cool UI 6.0 which is based on Android 5.1. Cool UI in this device provides features like multi-window mode, double tap wake up, and smart gesture.The device has 5.5 inch IPS display with resolution of 720×1280 and 267 ppi pixel density. The claimed viewing angle is 178 degrees.

    Note 3 4G LTE Dual sim

    Coolpad Note 3 dual sim Android smartphone is powered by 1.3GHz octa-core MediaTek MT6753 processor coupled with 3GB of LPDDR3 RAM. The device has 16GB of internal storage and support for microSD card upto 64GB. The smartphone is equipped with 13 mega pixel rear auto focus camera with LED flash, f/2.0 aperture and 5 Element HD Lens.  In the front, it has 5MP camera. Both front and rear camera has CMOS image sensor for better image quality.

    Coolpad Note 3 has 3000 mAh battery. One more key feature of this smartphone is Fingerprint scanner. It is said to support 360-degree finger rotation and speedy recognision in 0.5 seconds.  The sensors in the device are compass, gravity, proximity, ambient light, and gyroscope sensors. The connectivity features of Coolpad Note 3 are 4G LTE, 3G, Bluetooth and WiFi. The device will be available in white and black colours.

    Coolpad Note 3 is only smartphone within 10k price tag which has fingerprint scanner and 3GB of RAM. The closest competetor in this price tag are Yu Yureka Plus and Lenovo K3 Note. We will be able to compare how well it performs in real life scenarios only once we get a handson on this device.

    Coolpad Note 3 Specification

    •  1.3GHz octa-core MediaTek MT6753 processor with 3GB RAM
    • Cool UI 6.0 based on Android 5.1 Lollipop.
    • Fingerprint scanner.
    • 720HD 5.5 inch IPS display screen 267 pixel density.
    • 16GB internal storage and support for microSD card.
    • 13MP primary camera with LED flash.
    • 5MP front facing camera.
    • 3000 mAh battery.
  • How to Take Screenshot on Asus Zenfone 2 Laser

    Asus Zenfone 2 Laser is most affordable smartphone under Zenfone 2 series. It has decent specification and competetive price tag. The laser focussed camera is the key attraction of this smartphone. In this post we will learn how to take screenshot on Asus Zenfone 2 Laser. The device runs on Android Lollipop with ZenUI. The ZenUI provide lot of customisation which enhances the user experience. It also includes many features which are very useful. For performing print screen on Zenfone 2 Laser,  there are 3 methods. You can choose any of these screen capture methods.

    Asus Zenfone Laser

    Recommended reading:

    Asus Zenfone 2 Laser Review

    How to take screenshot on Asus Zenfone 2

    How to use Asus Zenfone 2 Laser as Modem or Tethering

    How to Take screenshot on Asus Zenfone 2 Laser

    There are two variants of Asus Zenfone 2 Laser. Both variants support below mentioned ways of capture screen methods.

    Method 1: Default Android method

    It is the most common and widely used method of taking screenshot on any Android smartphone. For this you need to press and hold volume down key and power button simultaneously for few seconds. The screenshot is captured. You can access the taken screenshot from Gallery.

    Method 2: Using Recent apps key

    For taking screenshot on Asus Zenfone 2 Laser using this method, follow the steps given below.

    • First go to the “Settings”. Under settings, you will find “Asus ASUS customised settings” . Tap on to it.
    • In this, choose the ‘Recent apps key’.
    • Under Recent apps key settings, you will find “Tap and hold to capture screen”. Choose that.
    • Now, whenever, you want to take screenshot on any page, just tap and hold recent apps key to take the screenshot.

    Method 3: Take screenshot on Asus Zenfone 2 Laser using Quick Settings

    For enabling this method, you need to customise the Quick Settings menu in Zenfone 2 Laser. For that, follow the steps given below.

    • Go to Quick Settings page by swiping down the screen from top.
    • Tap on edit quick settings icon.
    • In the quick setting option, the top row provides only 4 tools. So you need to disable one app appearing in the top row and choose, screenshot.
    • Tap on to save.
    • Now when you need to take screenshot, go to quick setting menu, you will find screenshot option. Tap on to it to take the screenshot.

    Hope this tutorial on How to Take Screenshot on Asus Zenfone 2 Laser is useful. If you are facing any issues while following the instruction, please share it in the comment section below.